
Eight steps to make AN hoses in your garage, at the track, or at the shop
One the fundamentals of building a drag car is plumbing. Fuel, oil, coolant, and hydraulic systems all need reliable and serviceable connections. In our world, that means AN fittings—an open-source fluid-transfer technology that dates back to World War II. We know many of you are working on your race cars during this pause in action, so for those plumbing a new car, or those with lines that need to be serviced, we offer this eight-step primer for the easiest way we know of to build a line.
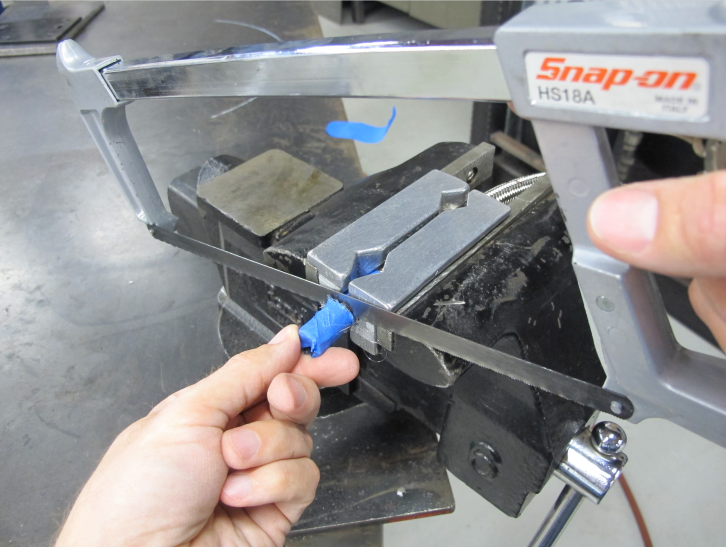
Step 1: A vise with soft jaws (XRP PN 821010), blue painter’s tape, and a hacksaw with at least 32-teeth per inch are required. Wrap the tape around the braided hose where you think the cut will need to be, measure and mark the actual location of the cut on the tape, and then cut the hose through the tape to keep the braid from fraying. Use the edge of the soft jaws to ensure the cut is straight and perpendicular to the hose end.
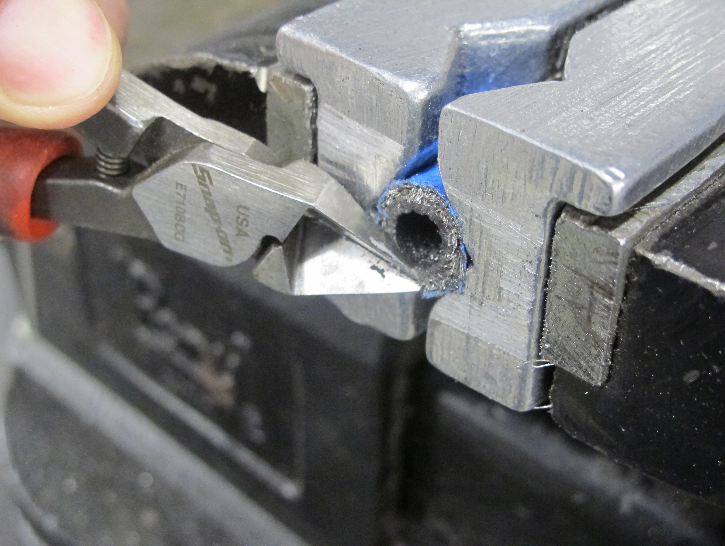
Step 2: Use diagonal cutters to trim any excess stainless-steel braid from the end of the hose. Use compressed air to blow contamination out of the line before installing the fitting.
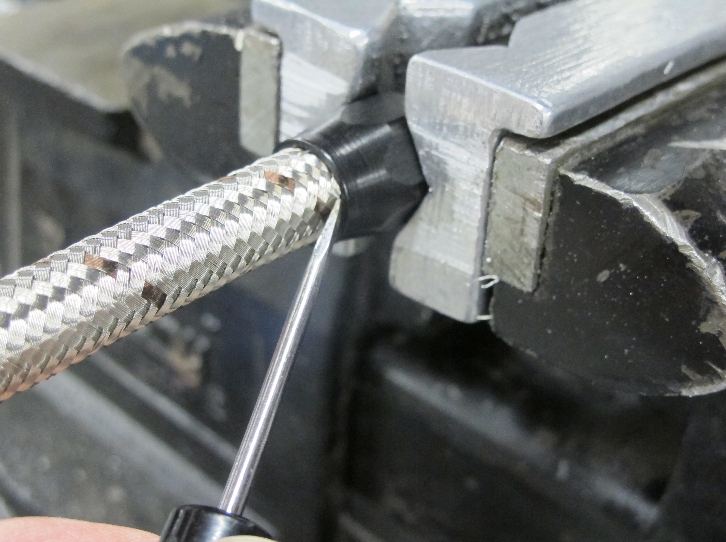
Step 3: Remove the hose from the soft jaws and install the AN socket-side fitting into position as shown. Remove the blue tape from the end of the hose, and install the hose into the socket using a small flat-head screwdriver to coax it in.
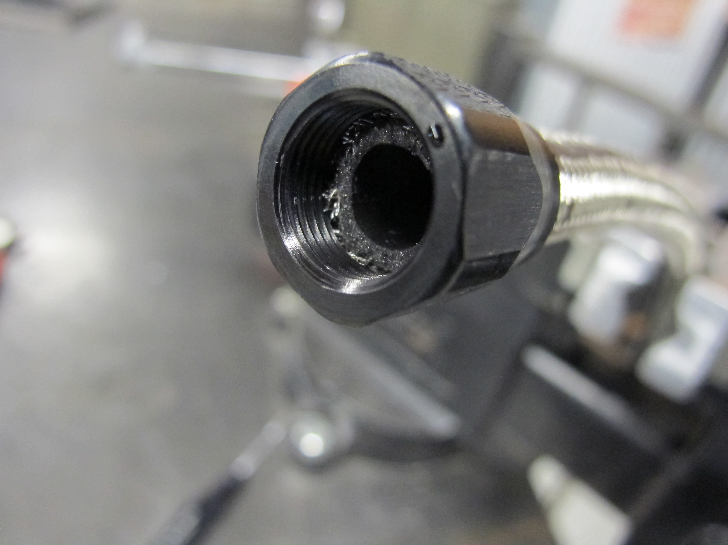
Step 4: You want a 1/16-inch gap between the end of the hose and the first thread.

Step 5: Mark the outside of the hose at the base of the socket so you can tell if the hose backs out when you tighten the cutter-side of the fitting into the socket.
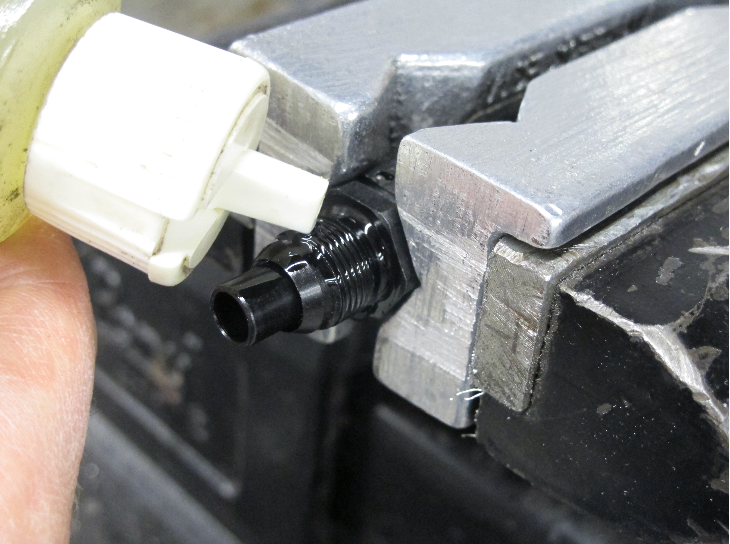
Step 6: Install the cutter-side of the fitting into the soft jaws and lubricate the threads and male end of the fitting that goes into the hose. We used 3-in-1 oil here but antiseize also works.
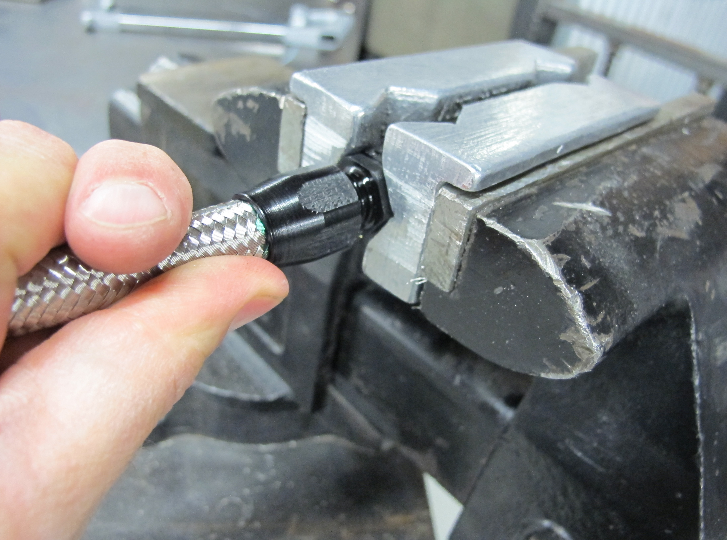
Step 7: Holding the hose, push the hose and socket-side of the fitting onto the cutter-side fitting in the vise. Turn the hose clockwise by hand to engage the threads. If the hose was cut square and the threads are lubricated well, you should be able to get nearly half of the threads engaged.
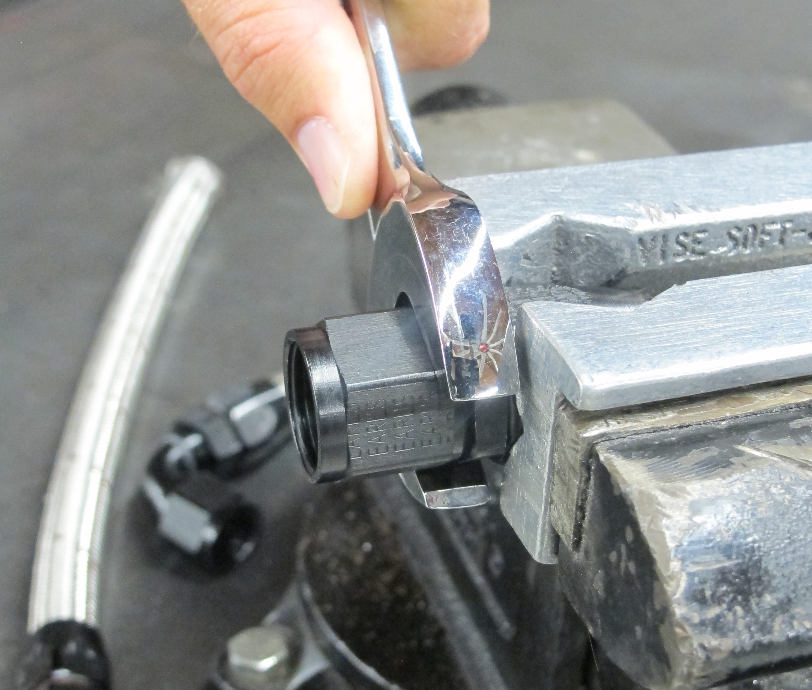
Step 8: Now spin the hose around and secure the socket-side of the fitting in the soft jaws. Use a smooth-faced open-end wrench or aluminum AN wrench to tighten the cutter-side of the fitting into the socket. Tighten until there is a gap of 1/16 inch between the nut on the cutter-side of the fitting and the socket-side of the fitting. Clean the fittings and rinse the inside of the completed hose with solvent before installing on the vehicle. Test the connection to twice the operating pressure before you put the fitting to use on track.
(From David Kennedy)
Post time: Dec-24-2021